This guide shows how to set up your iPhone with your Hosted Email mailbox. It assumes iOS 14 or later.
Get Started
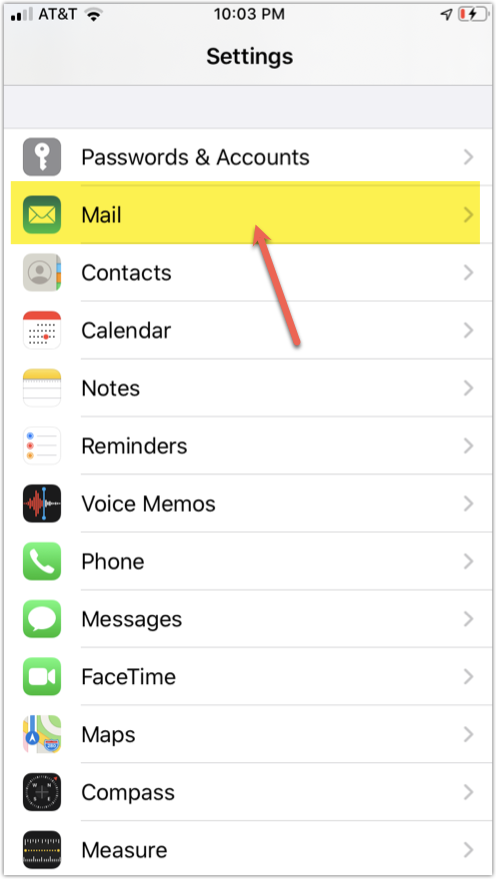
- Open Settings.
- Tap Mail.
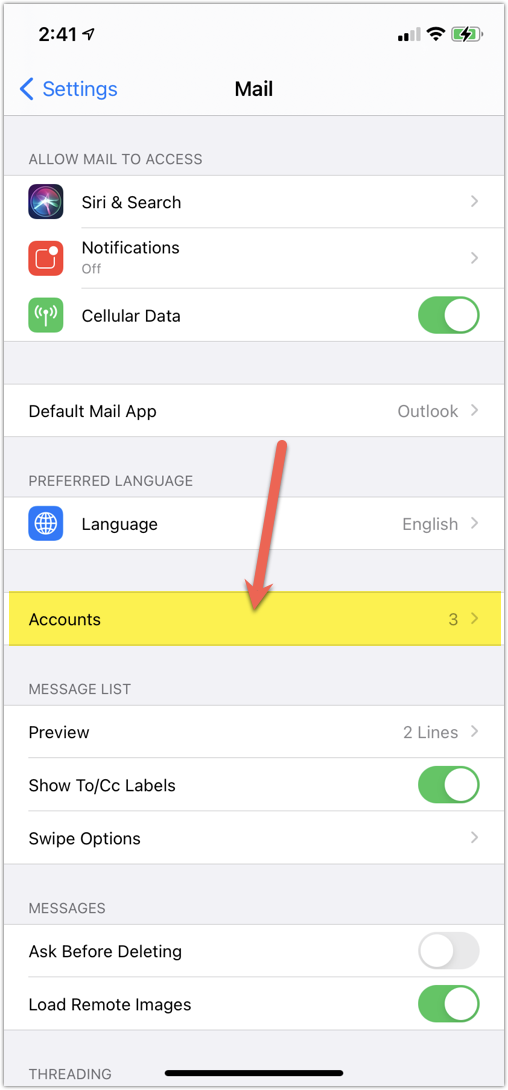
- Tap Accounts.
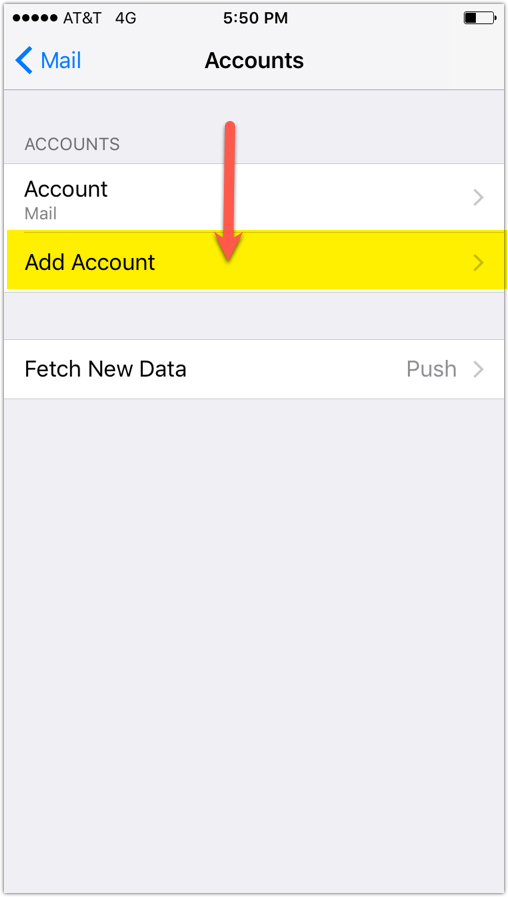
- Tap Add Account.
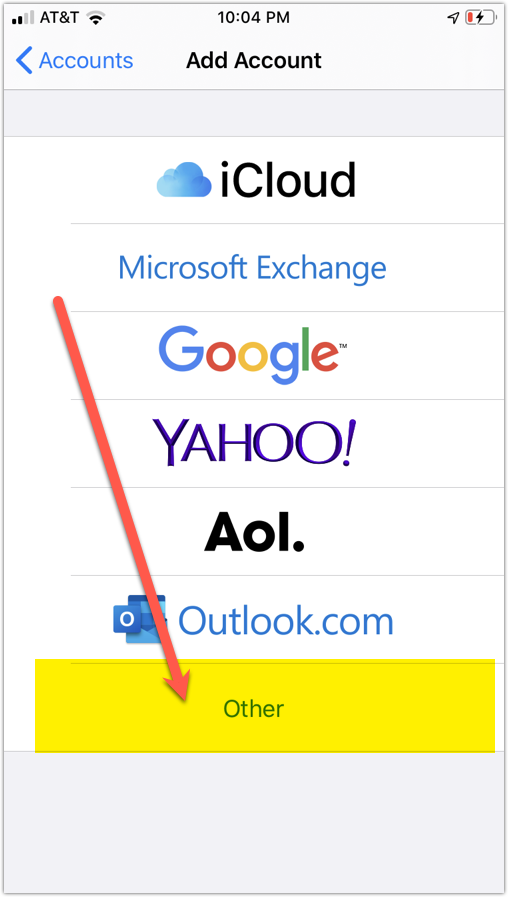
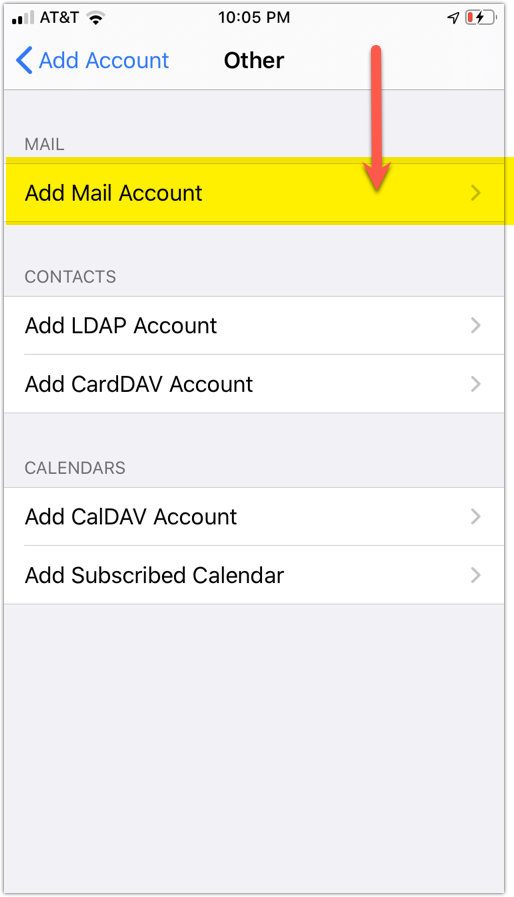
- Tap Other.
- Tap Add Mail Account.
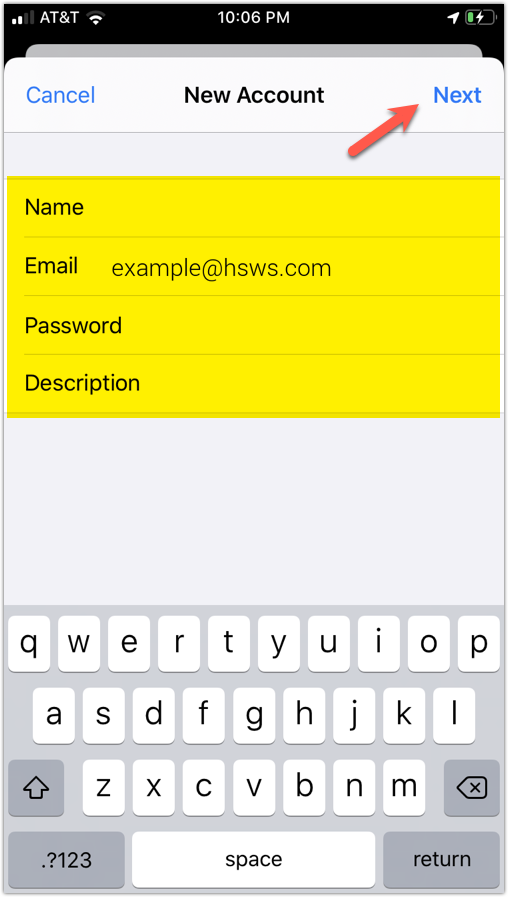
Account Info
- Name: Your name
- Email: example@hsws.com
- Password: Your mailbox password
- Description: Any label you want
Tap Next.
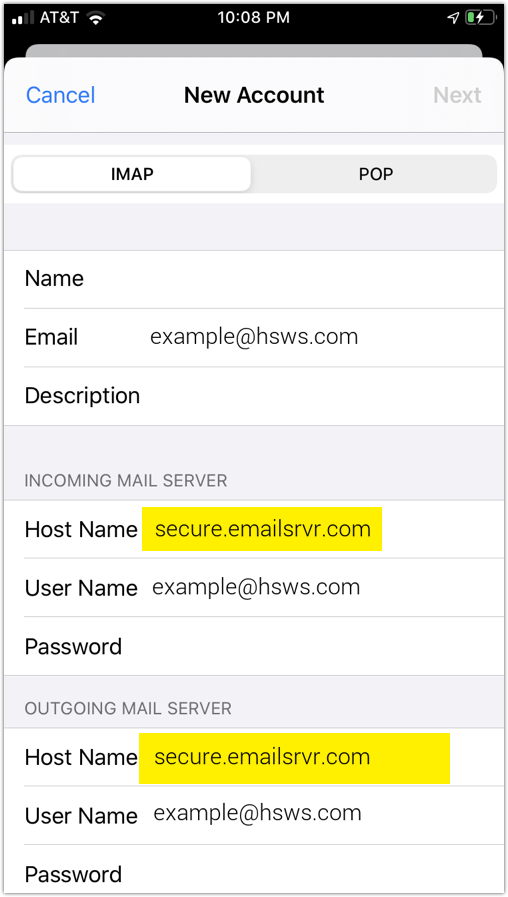
Server Settings (IMAP)
Choose IMAP and enter:
Incoming Server
- Host: secure.emailsrvr.com
- User: example@hsws.com
- Password: Your password
Outgoing Server
- Host: secure.emailsrvr.com
- User: example@hsws.com
- Password: Your password
Note: Outgoing fields are not optional. Leaving them blank will prevent sending email.
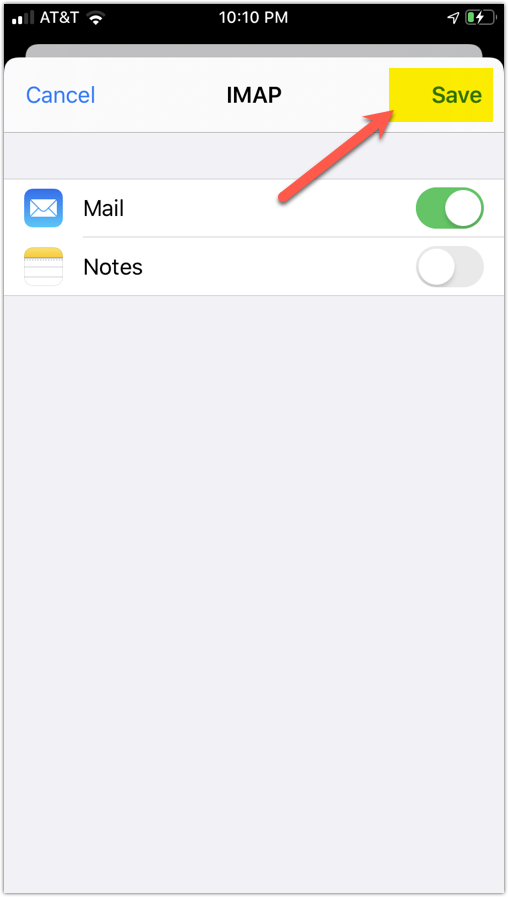
Tap Next then Save.
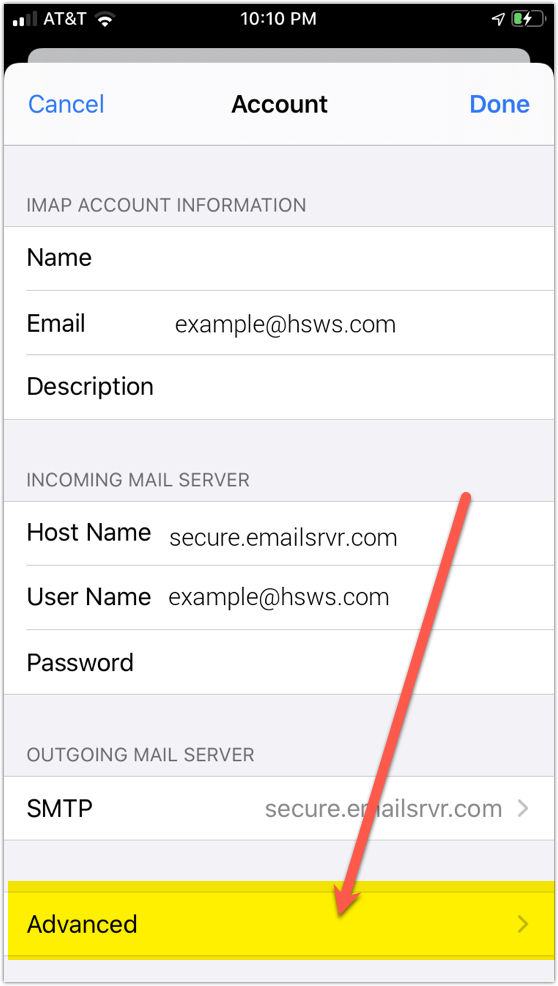
Folder Mapping
Next, we are configuring your iPhone to sync your various IMAP folders and prevent duplicate folders from showing up. We call this Folder Mapping; below are the steps to do so.
- Open your new email account inside Mail settings.
- Tap Account under IMAP.

- Tap Advanced.
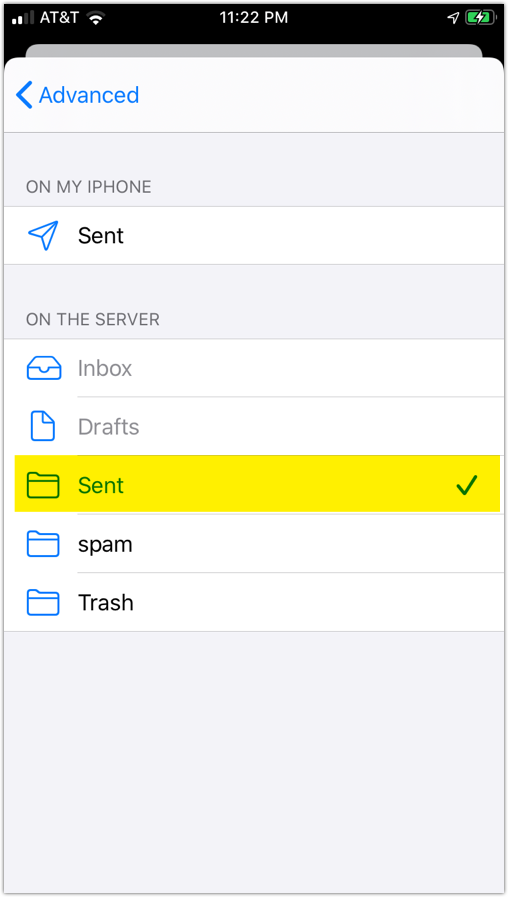
- Tap Sent Mailbox and choose the Sent folder “On the Server”.
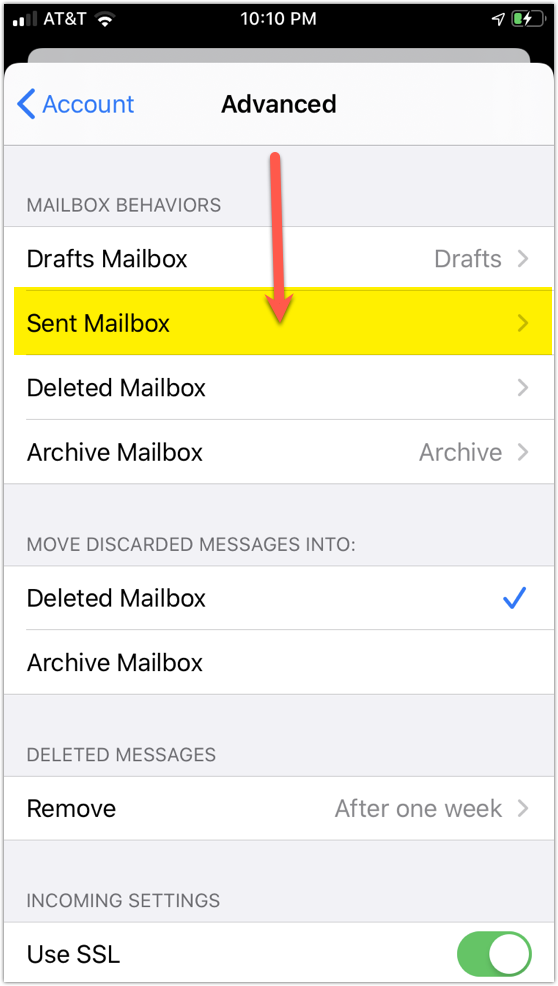
- Now repeat the previous step for Deleted Mailbox.
Ignore the Archive Mailbox, it won't be used. - Last step! Make sure Deleted Mailbox is selected under MOVE DISCARDED MESSAGES INTO. This will ensure deleted messages go to the Deleted Mailbox folder.
- Now you're done! Go back to the home screen and launch the Mail app. Your email should appear within a few minutes, depending on the amount of items to sync.
Note: If you have a large mailbox, it may take several minutes before email appears. Please wait at least 15 minutes before troubleshooting.
You can set up other devices here: https://help.emailsrvr.com/setup/qa/
