You are reading this article to understand how to enable email forwarding in SmarterMail.
Overview
- Email forwarding in SmarterMail is controlled at multiple levels for security.
- You must enable forwarding at both the domain level and the user level before it can be used.
- There are three steps required to fully configure forwarding for a user.
Table of Contents
- Step 1 – Enable Forwarding at Domain Level
- Step 2 – Enable Forwarding at User Level
- Step 3 – Create the Forwarding Rule
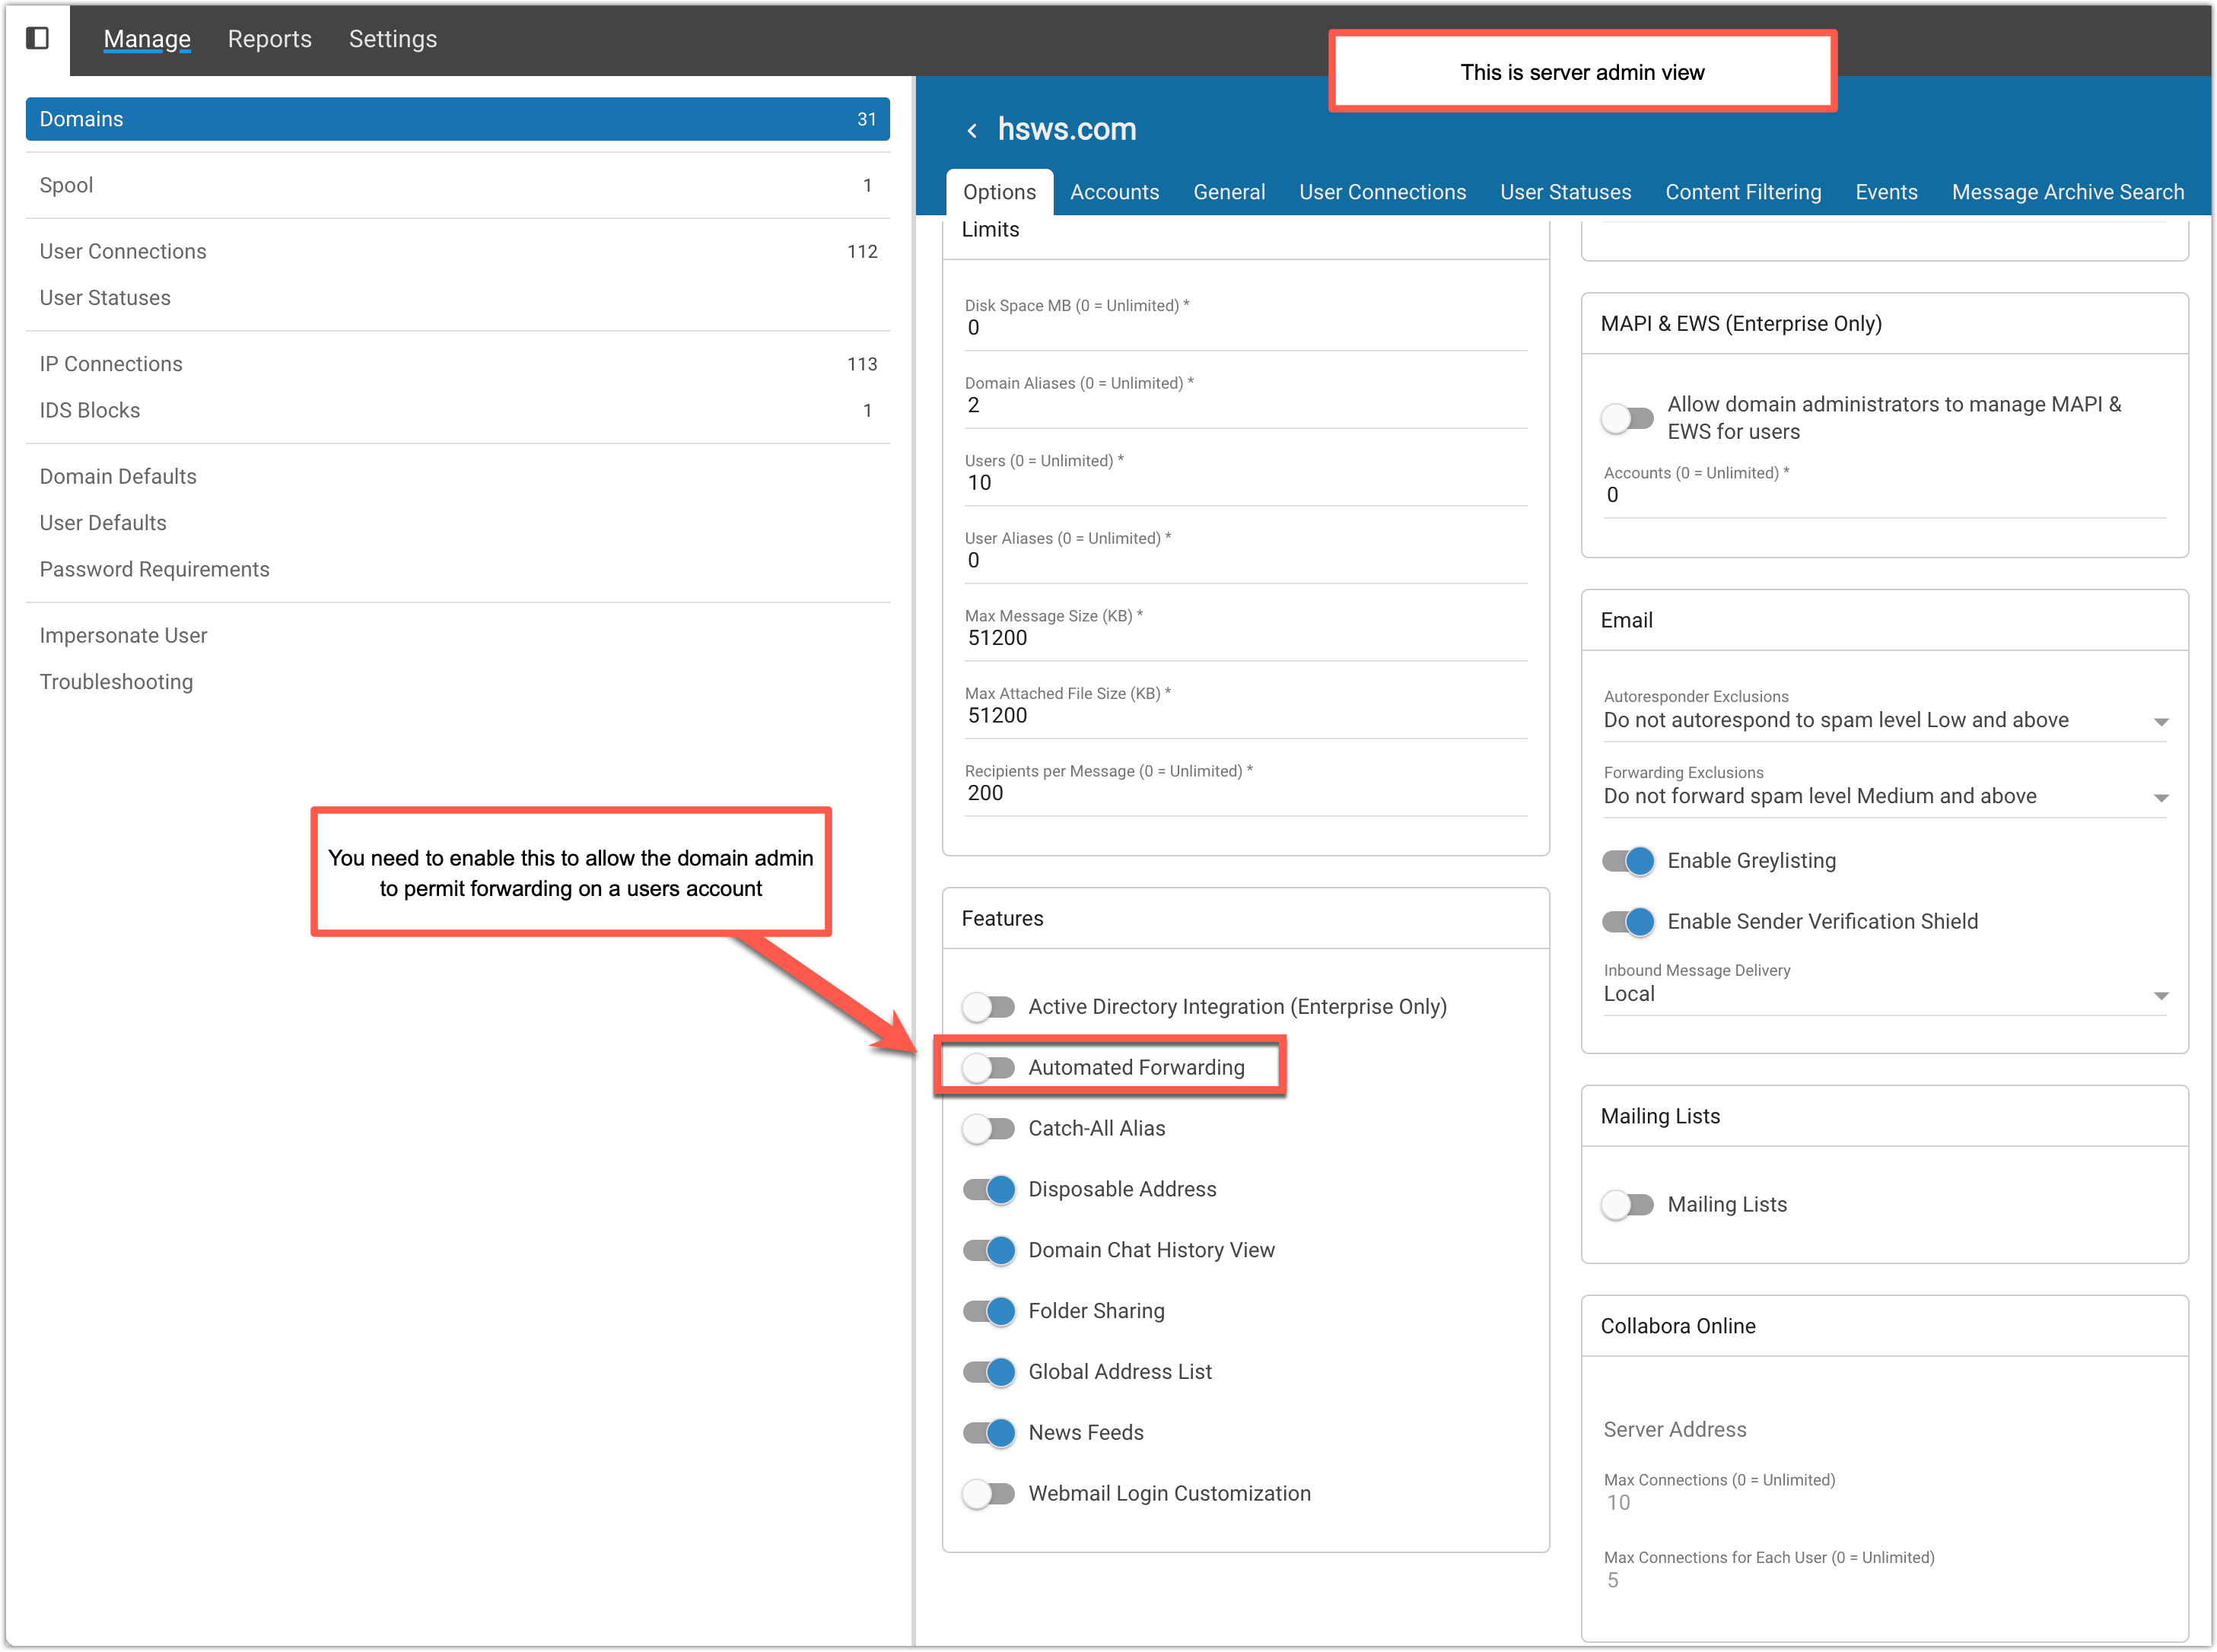
Step 1 – Enable Forwarding at Domain Level
- Log in as Server Administrator
- Navigate to: Manage → Domains → {domain_name}
- Select the Options tab
- Locate the Features section
- Enable: Automated Forwarding
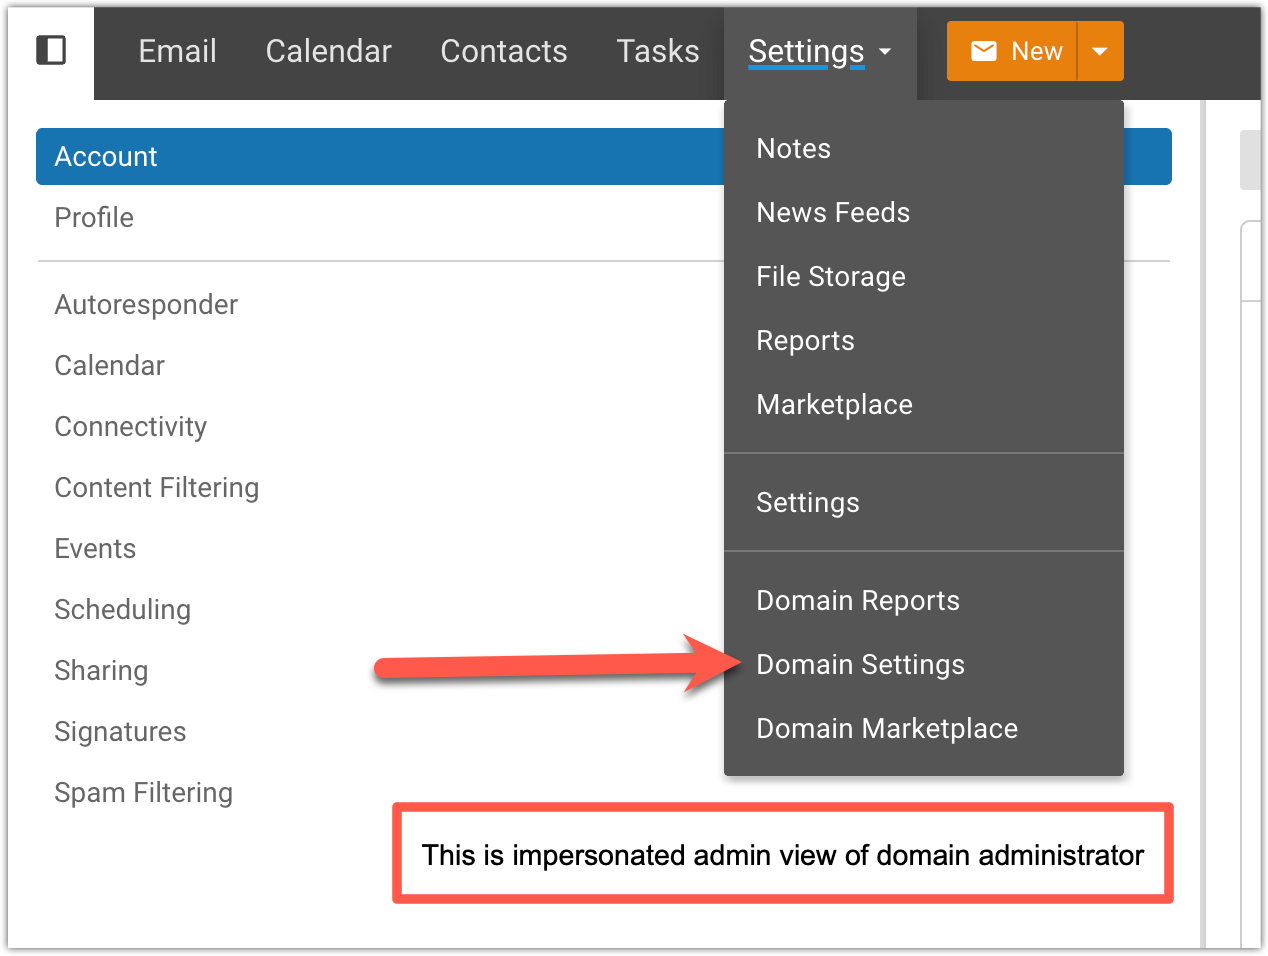
Step 2 – Enable Forwarding at User Level
- Log in as Domain Administrator (or impersonate the domain admin user)
- Navigate to: Settings → Domain Settings
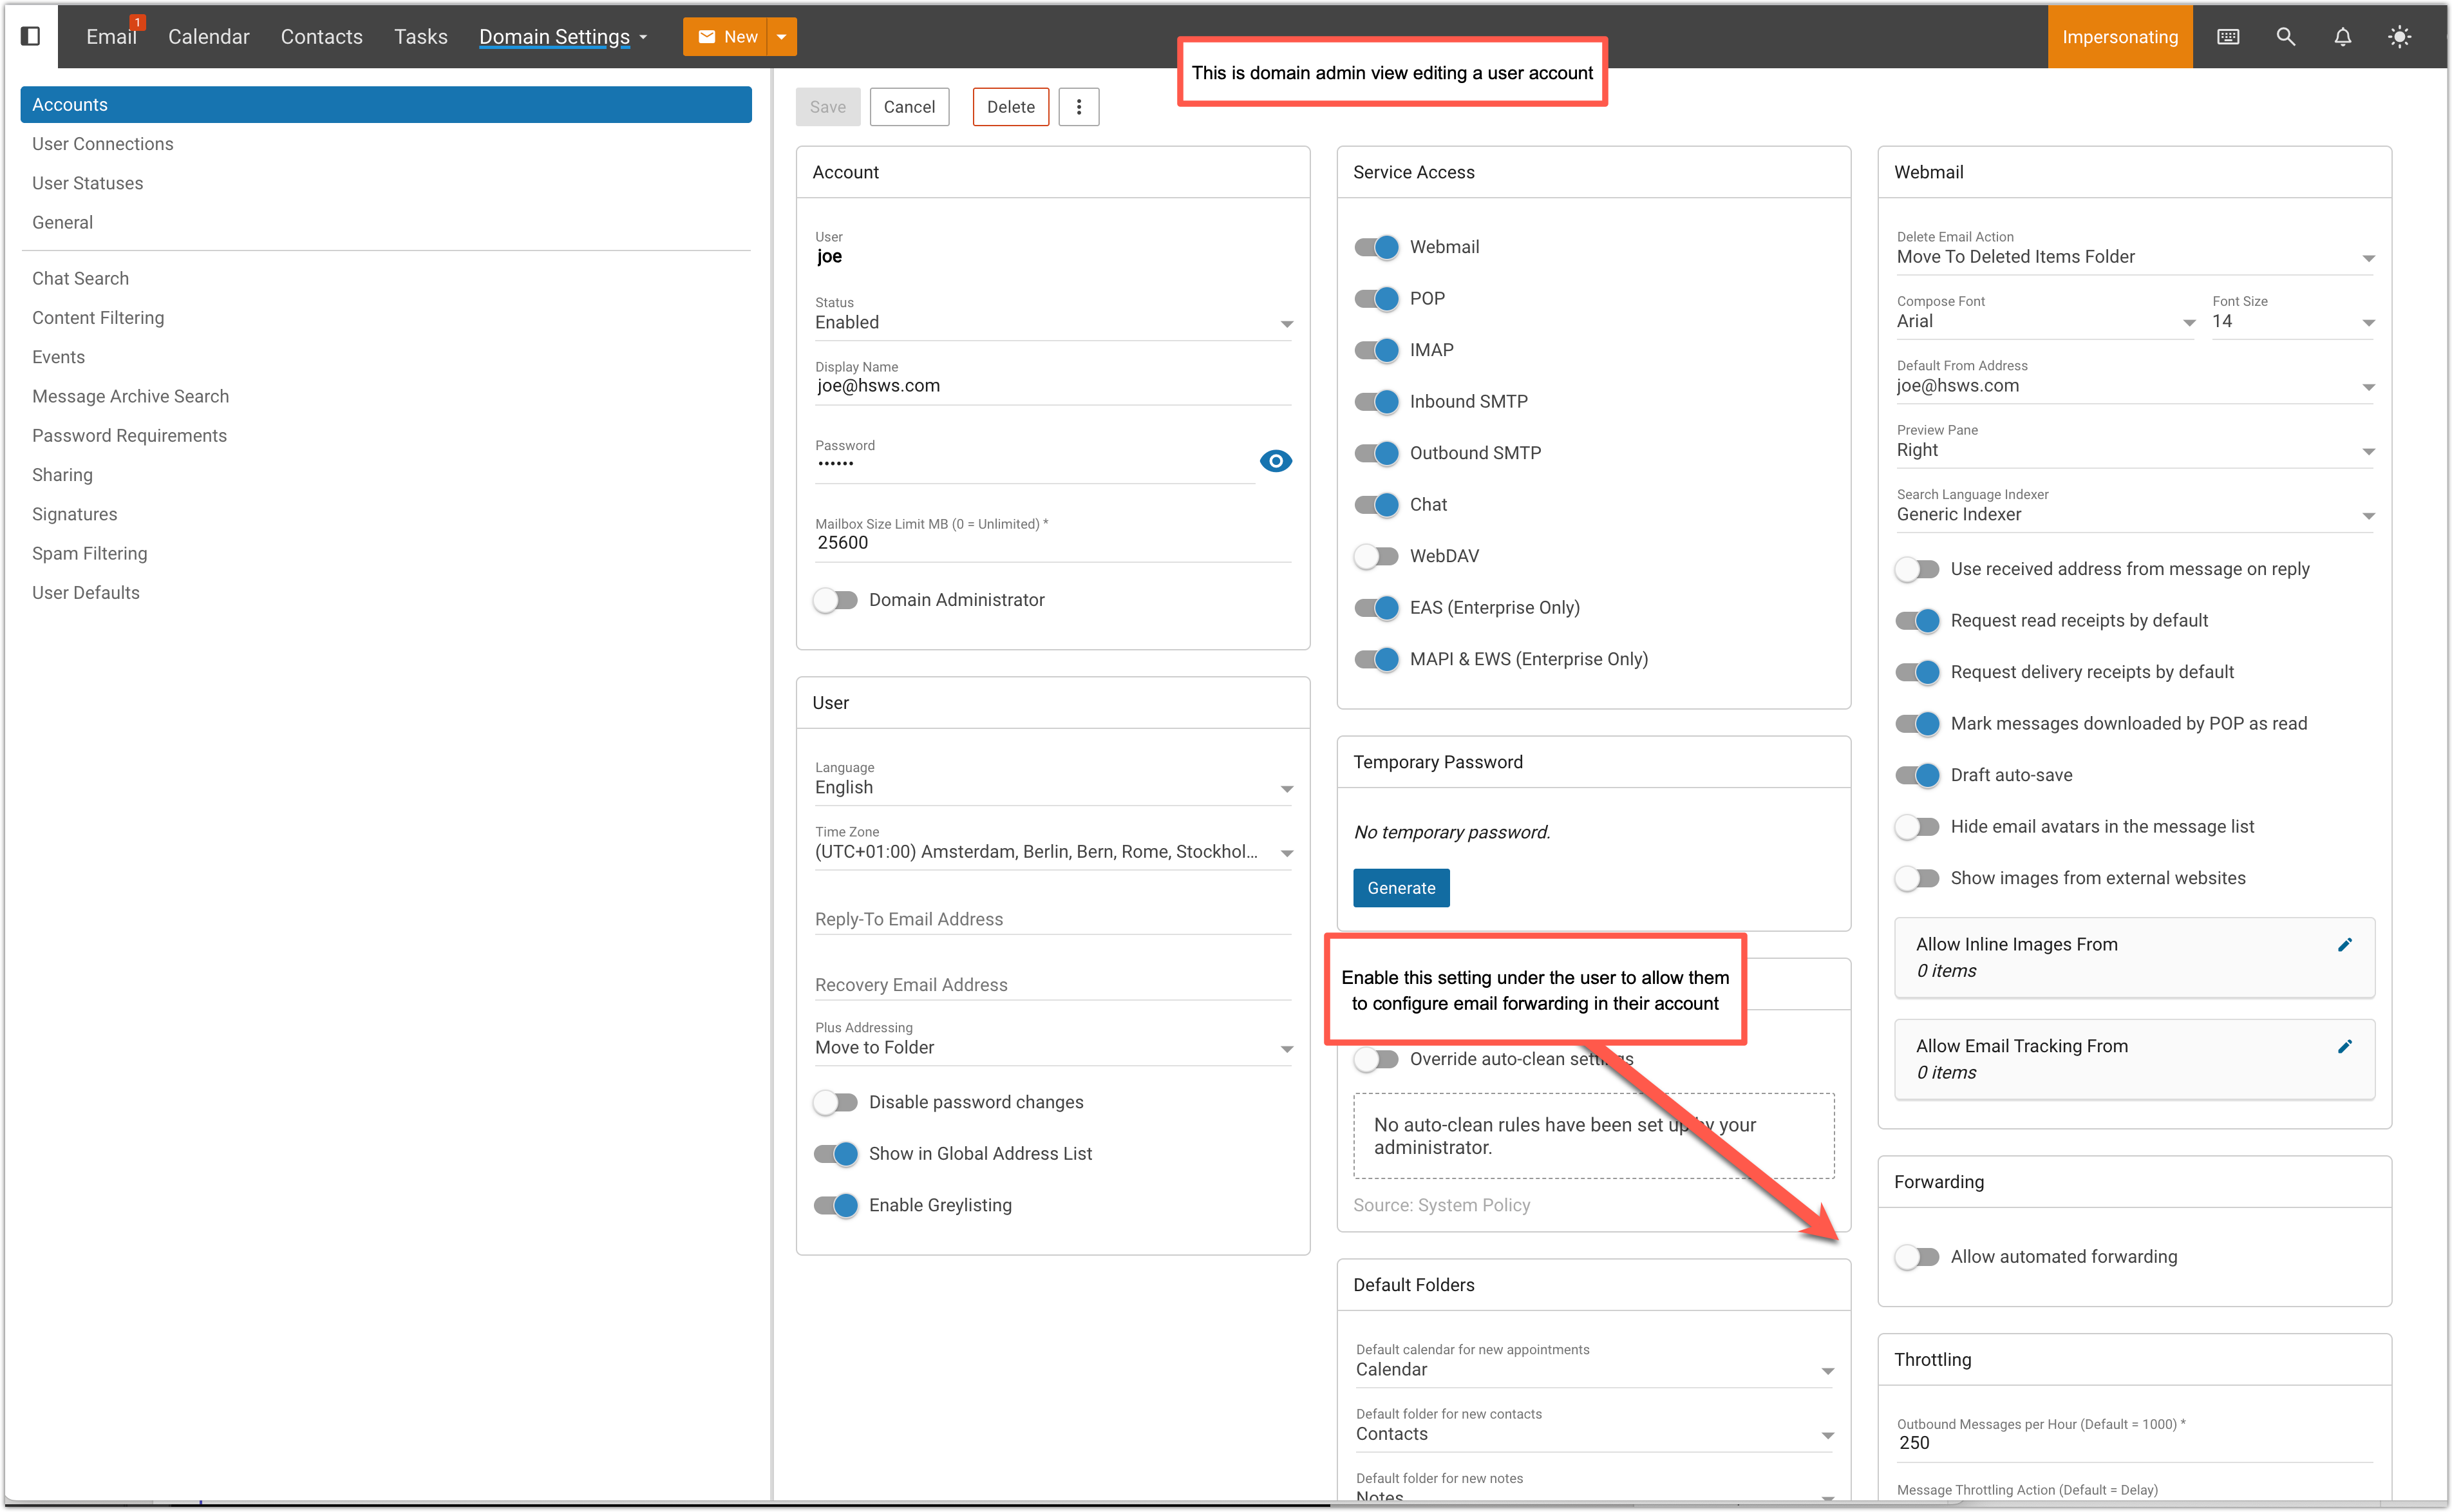
- Select the user who requires forwarding
- Locate the Forwarding section
- Enable: Allow Automated Forwarding
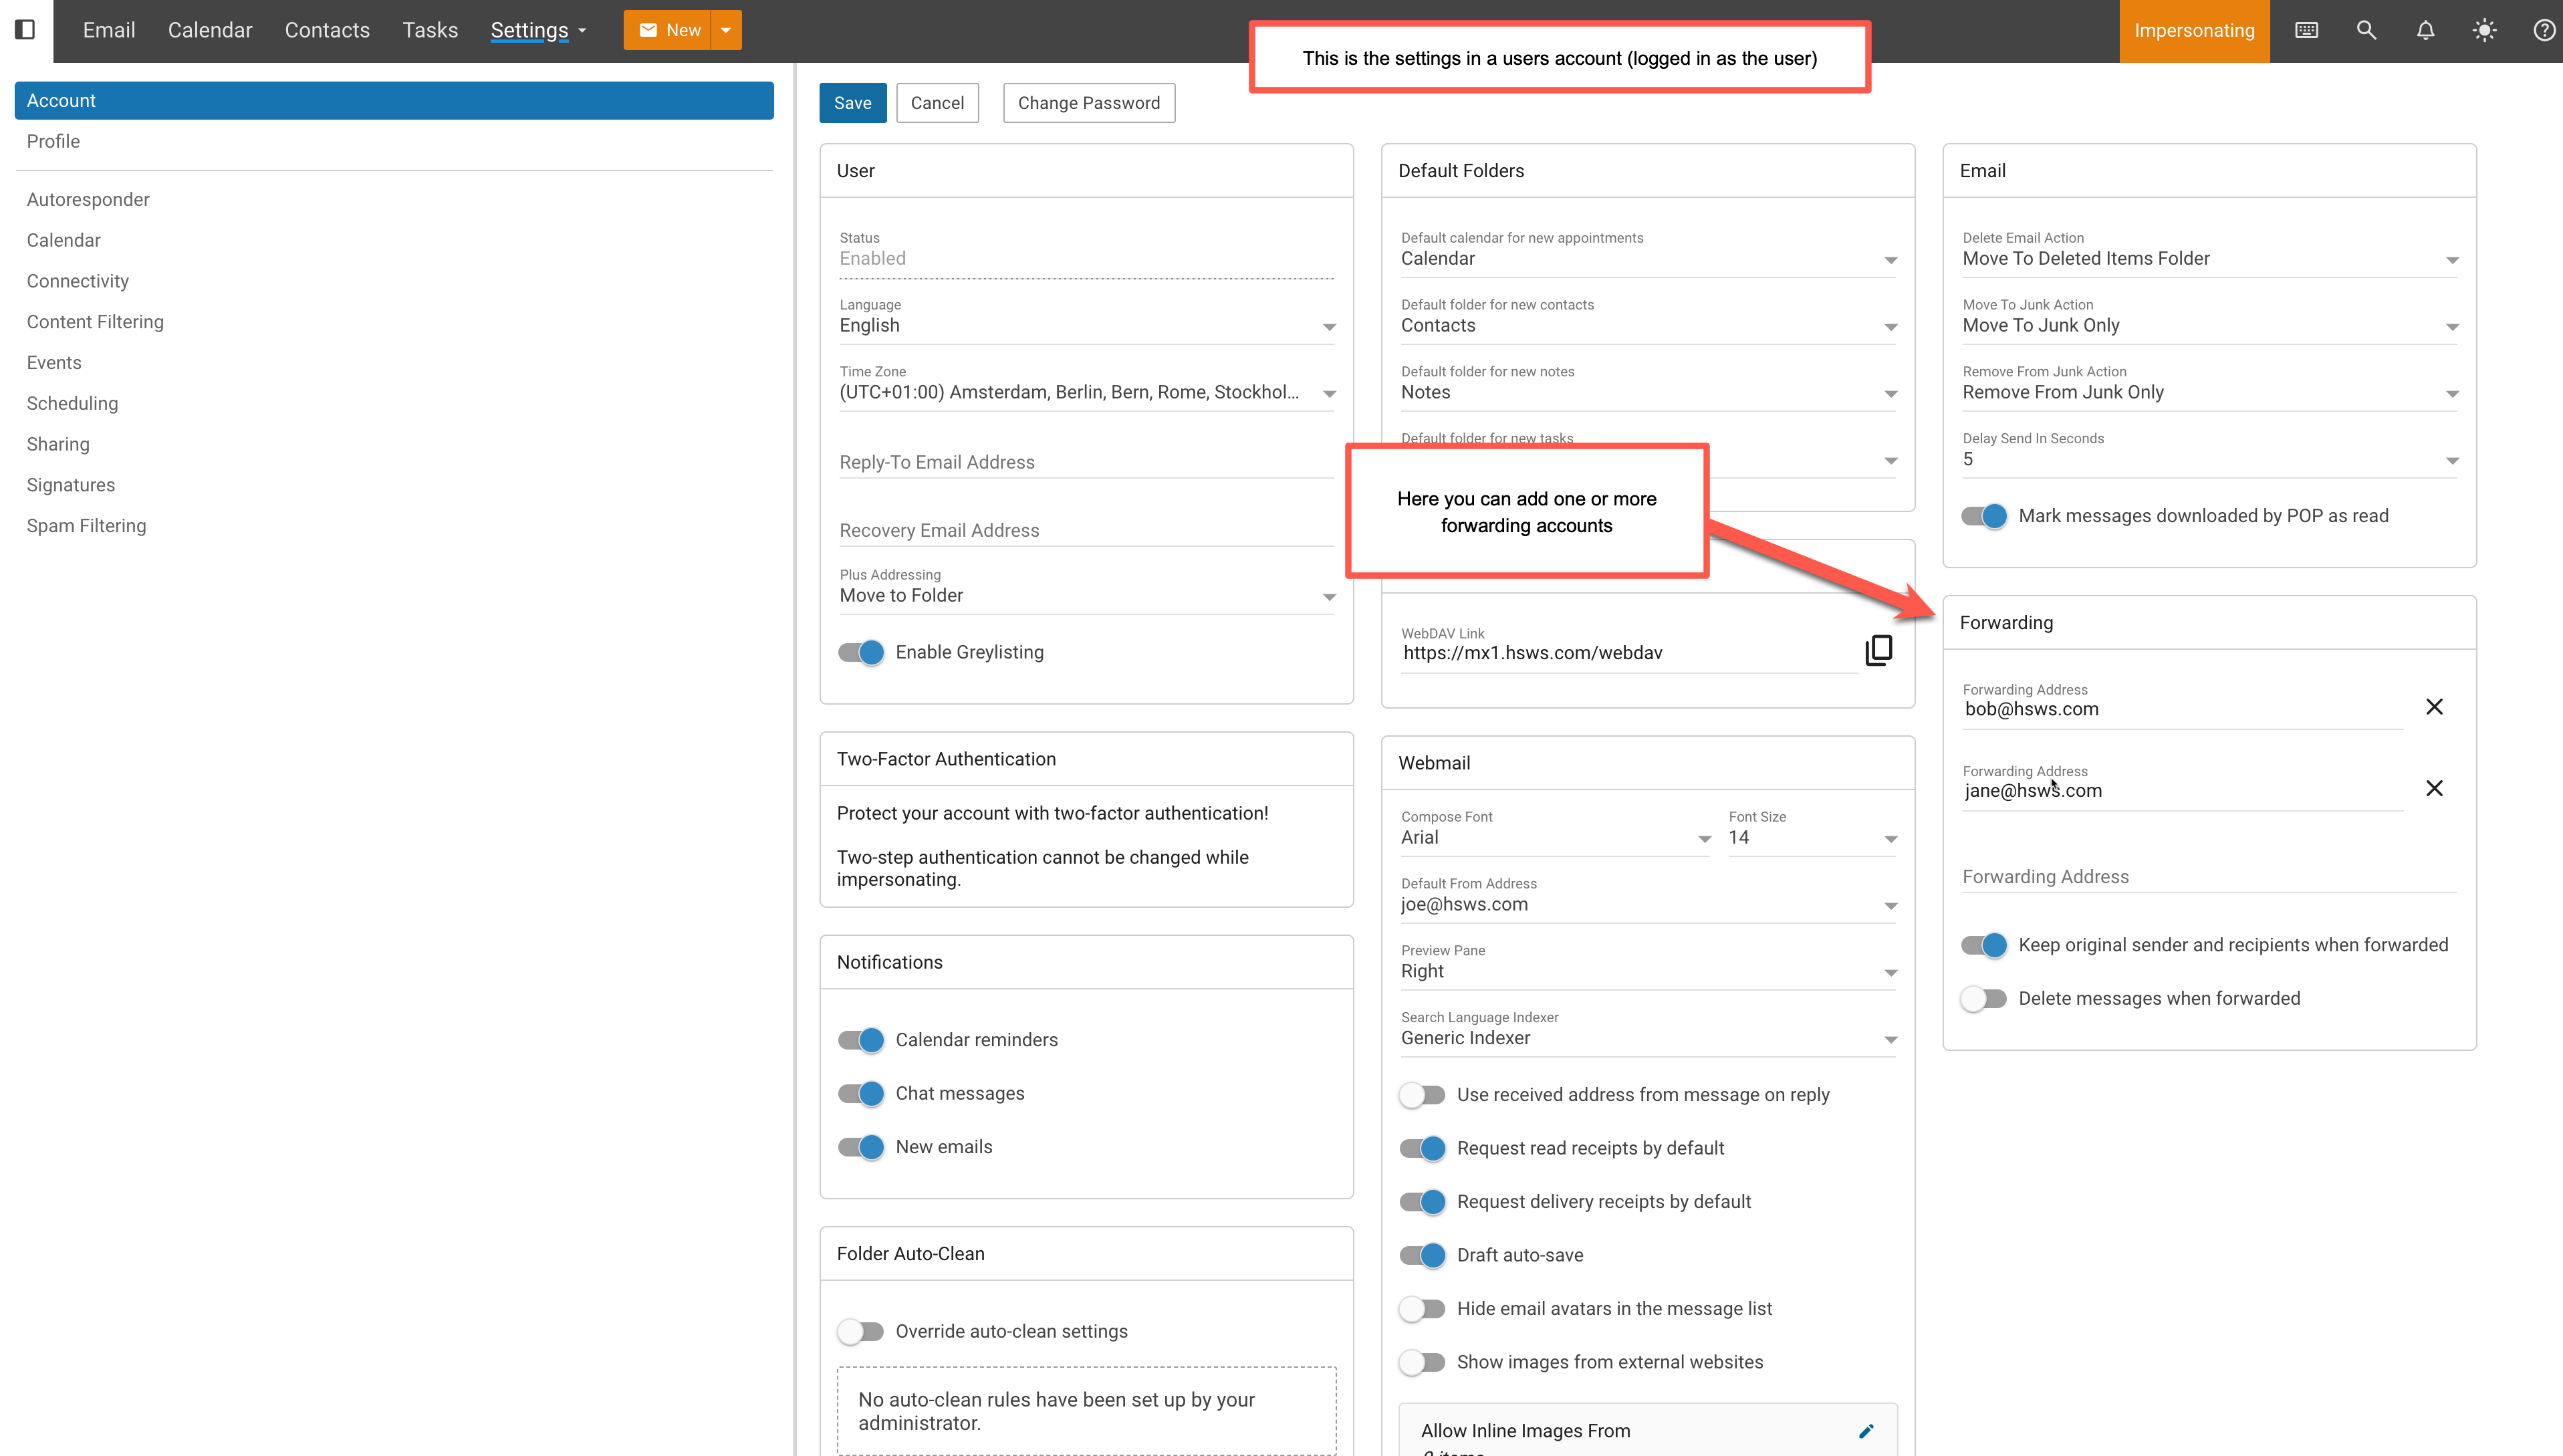
Step 3 – Create the Forwarding Rule
- Log in as the User (or impersonate the user)
- Navigate to: More → Settings → Account
- Locate the Forwarding section
- Enter the destination email address
- Save changes
Important Notes
- If forwarding is not enabled at the domain level, it will not work for any users.
- If forwarding is not enabled for a specific user, they will not see the forwarding option.
- Both levels must be enabled before the forwarding rule can be created.